Make snow like Elsa: Frozen STEM Activity
This is a guest post from Kim at Team Cartwright
Do you want to build a snowman?
Or just see what it feels like to create ice on a whim like Elsa?
It’s easier than you think.
If your kids love the movies Frozen and Frozen 2 then this is the perfect way to take advantage of that and get them excited about science.
Who wouldn’t want to make their own snow and ice?
Take advantage of your children’s love for this fun movie and toss in some learning. It’s pretty fun.
Here are two sensory STEM snow activities for Frozen loving kids.
Sensory STEM Snow Activities
Sensory activities are so important for kids.
It gives them the opportunity to play and learn.
Seriously, so much brain development goes on when we step back and let kids just experience things. (Learn more about why sensory play is a must —> The Big Benefits of Sensory Play)
Adding some STEM to the play just makes it better!
Yep, kids need science too.
Don’t worry, it doesn’t have to be hard or scary.
These activities need 3 things between both of them. You can do this.
Making Snow
Just like Elsa made it snow, you can create your own snow to play with, regardless of the temperature outside.
You Need:
- Baking Soda
- Conditioner
To Do:
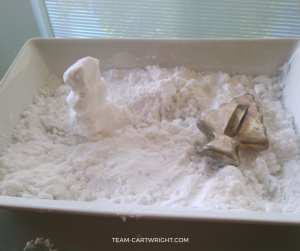
Measure out 3 cups of baking soda and place them in a bin your kids can play in.
Add 1/2 a cup of conditioner and mix it together with your hands.
Then hand it over to your children to play!
The baking soda and conditioner mix together to form a soft snow-like substance that you can shape and play with.
Cookie cutters work well for making shapes, and of course, you can make a little snowman. (Get more sensory STEM activities —> Easy Sensory STEM for Toddlers and Preschoolers)
The Science:
What is happening here is a simple chemical reaction.
The key thing that makes it different from a lot of other reactions is that it is endothermic.
This means that heat is absorbed during the mixing process. As a result, the snow actually feels cold.
This is a great one to let your little ones experiment with.
What happens if you change the ratio of baking soda to conditioner?
Can they make a lighter snow? A wetter one? What makes the snow stick the best?
If you want to take it up one more level, let your children melt the snow when you are done playing with it.
How should you melt it? Yep, vinegar.
The baking soda and vinegar reaction is classic. (Think homemade volcanoes.)
Give your child some vinegar in a squirt bottle and let them melt their snow! (Find more fun ways to make an explosion—> 3 Easy Volcanic Eruptions)
Flash Freeze Ice
Else is able to freeze things just by touching them.
I can’t really promise your child can do that, but they can flash freeze some water just by hitting a water bottle.
You Need:
- Bottled Purified Water, Unopened (it’s a good idea to have a couple of bottles)
To Do:
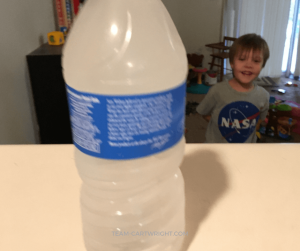
Put an unopened bottle of purified water on its side in the freezer.
Try to make it so nothing else is touching the bottle.
Leave it in there for 2 hours and 30 minutes. No peaking. (Seriously, try to time it out so no one is going into the freezer during this time. Consistent temperature matters.
After the two and a half hours carefully remove the bottle from the freezer.
Time matters here, so you want to move relatively quickly.
However, you need to be as smooth as possible. Don’t jostle the bottle or hit it on anything until you are ready.
Have your child gently take the bottle and hit it, bottom down, onto a table. (Alternative for younger kids: have them hit the bottle.)
Watch closely while you hit the table, and you will see the ice freeze into slush instantly!
It really is pretty cool how quickly it happens.
The ice the is created is slushie.
It is easiest to cut the bottle to get the slush out if you want to play with it or eat it. The slush will quickly turn back to water though.
Warning for this one.
It can take a few tries to get it right, as you do have to be very careful before you hit the bottle.
To help with that it is a good idea to start freezing two bottles, and after about 15 minutes put two more in the freezer. (Quickly, of course!)
This gives you back up bottles to try again without having to wait the full two-plus hours.
The Science:
What is happening here? What you have done is supercooled the water.
That means you brought it down to the freezing point, but the water did not yet freeze into solid ice.
Because we are using purified water, there are no impurities to start of the ice forming process. (This is called nucleation.)
The water is in a metastable state when you gently remove it from the freezer.
When you hit it on the table or hit the bottle that disruption is enough to cause the water to freeze!
That single event starts a chain reaction of crystallization, resulting in the slush.
Let Your Elsa Powers Loose
These are fun ways to bring Frozen to life a little bit.
Sensory play is important for kids, and tying these projects into a loved movie boosts interest as well.
Disney isn’t the only one who can bring magic to the table.
Science can make your imagination soar too.

Here are some more fun learning activities to try!
The Science of Slime and the Best Homemade Recipes
At Home Chemistry: Cleaning Pennies with Ketchup
Simple, Strange, and Fun Human Tricks to Mess with Your Kids

Kim is the mother of 3- a 5-year-old son and two-year-old twin daughters. She blogs at Team-Cartwright.com about life with twins and easy and fun STEM projects for kids. You can follow her on Instagram for new fast learning activities every day!
- A Letter to my Son on His 16th Birthday From Mom (Kye’s Bday Letter) - March 20, 2025
- Open Letter to my Daughter on her 12th Birthday – Love, Mom {Britt’s 12th Bday Letter} - January 16, 2025
- Letter to My Son on his 6th Birthday – Love Mom - January 8, 2025






Does any conditioner work?